
This article describes how to do data transfer between two flexy devices using OPC UA. Please be aware that for this application, both flexy devices need to be connected to the same LAN. Also, this application only applies to read and write instantaneous tag values, not the historical logging or alarm values.
In this article:
• Topic 1: Setting Up the Server Flexy
• Topic 2: Setting Up the Client Flexy
• Topic 3: Data Transfer between the Flexy
Products:
This article is applicable to all Flexy devices, and in this example the following models where used:
• Flexy 201
• Flexy 205
Topic 1: Setting Up the Server Flexy
• To set up the flexy as an OPC UA server (in this case, Flexy 201), go to one of your flexy’s web interface Setup → System → Main → Net services → OPC UA and check the “enable OPC UA Server” box.
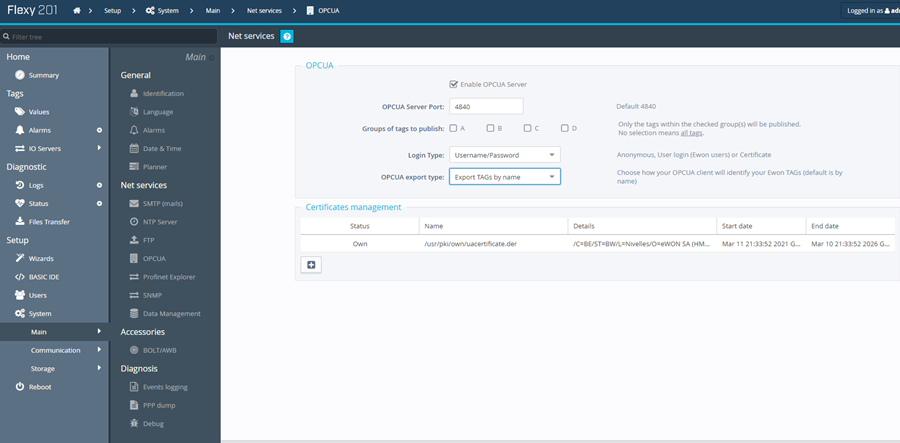
Fig 1. Enable OPC UA Server
• As the OPC UA server is being enabled, you have the option to choose what login type to use to access the server (Username/Password, Anonymous, or Certificate); where the Username/Password are the same as the web interface log in, the Anonymous does not require any login credentials, and the Certificate uses encrypted certificates to grant you access.
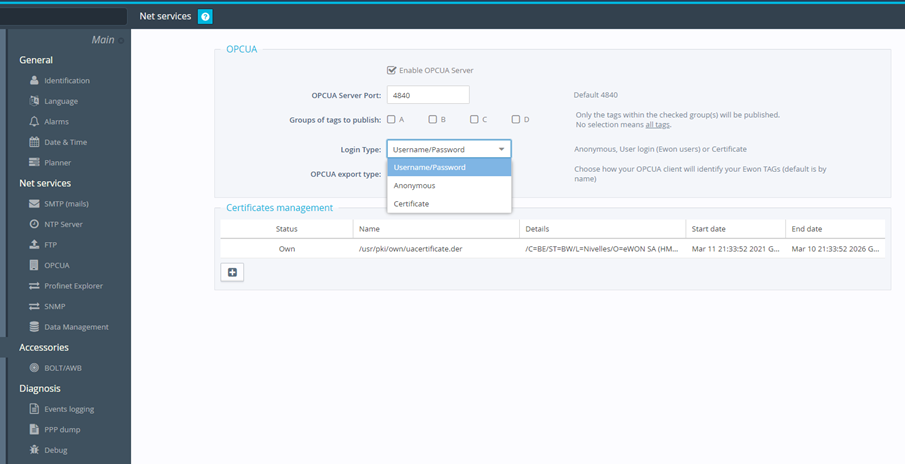
Fig 2. Login Type
• There is also an option to choose which OPC UA export type you would like to export your data: Export TAGs by name or Export TAGs by ID. After you have chosen your data type, you can click on Update.
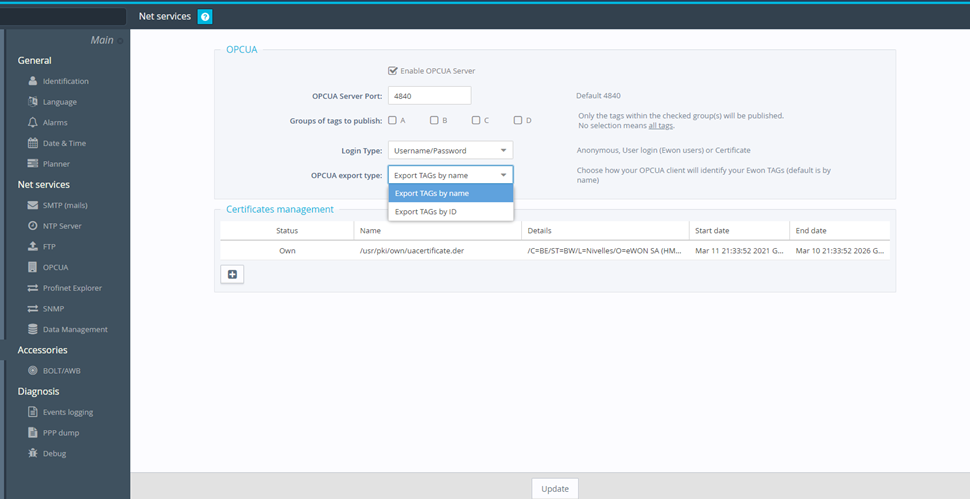
Fig 3. OPC UA export type
• Now create a tag from your desired IO server. In this case the built-in EWON IO server was used. Skip this step if you have already added your desired tags to the flexy.
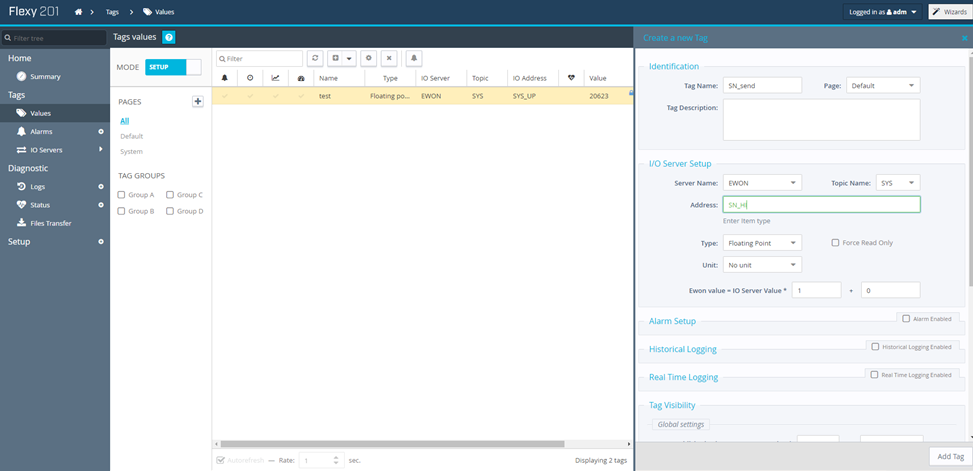
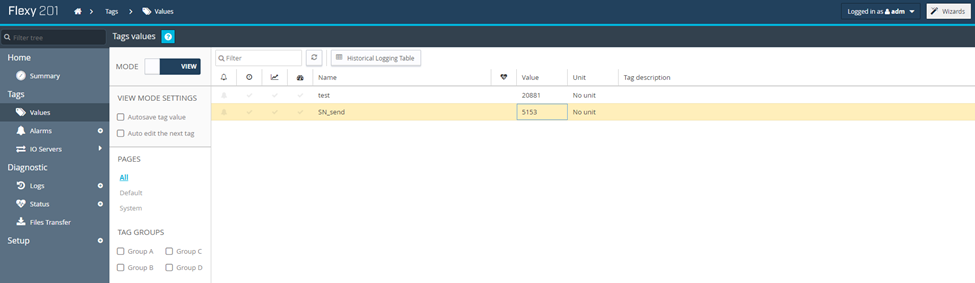
Fig 4. Creating a tag at the server flexy
Topic 2: Setting Up the Client Flexy
• To set up the flexy as an OPC UA client (in this case, Flexy 205), go to one of your other flexy’s web interface Tags → IO Servers → OPC UA → Check the “enable” box on the Topic A section
• Add the Endpoint URL (which is the LAN IP address of your server flexy)
• Choose the authentication setting (this should match the login type from the server flexy)
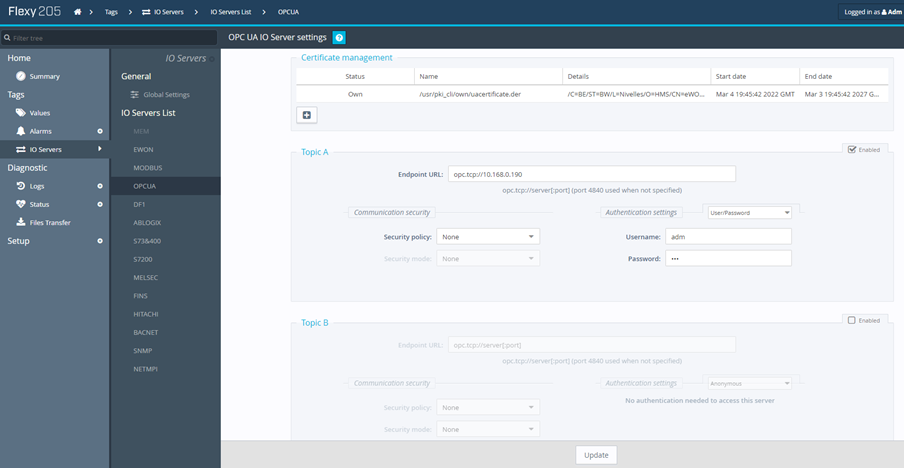
Fig 5. Enable OPC UA Client
Topic 3: Data Transfer between the flexy
• To initiate the data transfer between the flexy, go to the client flexy Values-> Add tag → select the I/O server name as OPC UA.
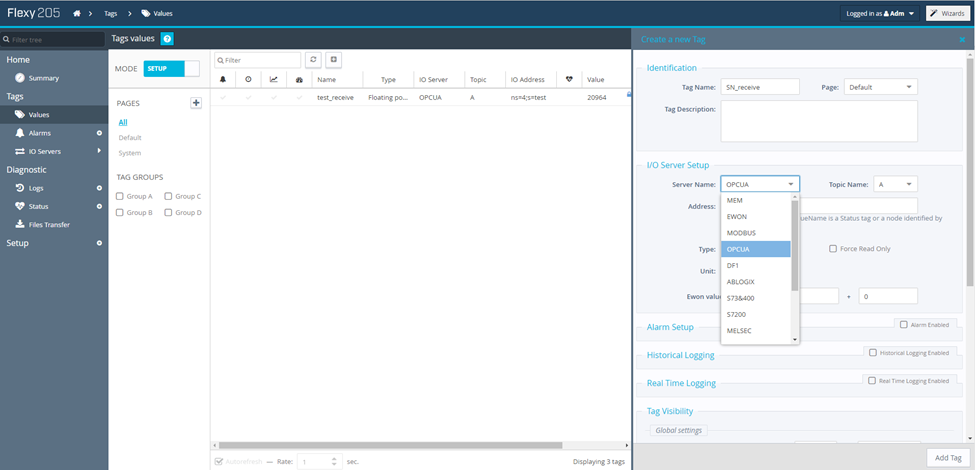
Fig 6. the I/O server name as OPC UA
• Click on the Address, and the Select mode box from the OPC UA server will pop up with all the objects from the server flexy including its tags.
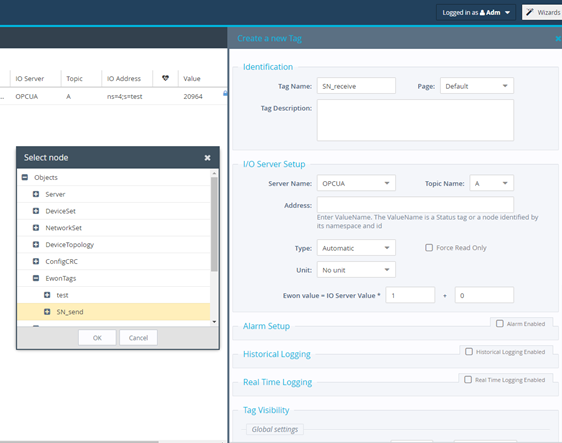
Fig 7. Selecting a tag from the OPC UA Server (at the OPC UA client side)
• After selecting the desired tag, click on add tag.
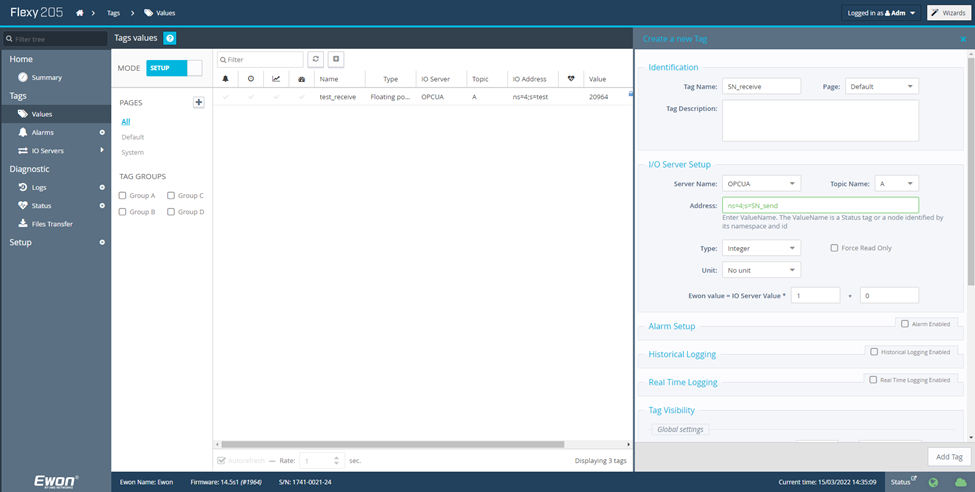
Fig 8. Transferring a tag from the OPC UA Server flexy to the OPC UA Client flexy
Comparing Results:
• The following results show that a tag created at the OPC UA server flexy, “SN_send”, was transferred to the OPC UA client flexy as a new tag called “SN_receive”. Using OPC UA, the read and write functionality works both ways; therefore, you can write a new value from the client side, and it will be sent to the server side as well.

Fig 9. OPC UA Server flexy tag

Fig 10. OPC UA Client tag from server
Additional resources:
For more information about OPC UA and its security features please read OPC UA Server and OPC UA Client.
Keywords:
Flexy; data transfer; OPC UA; Server; Client; Tag; instantaneous values; realtime values; same LAN; local connection; create tag; transfer tag.